Feature Overview
rv is built around a simple idea: keep scene generation in Python, but reuse Blender's modeling, shading, geometry nodes, physics, and rendering stack for the heavy lifting.
The examples in examples/ cover the main workflows you will use in practice. This page summarizes those features and points to the corresponding example scripts.
Build scenes with a small Python API
At the core of rv is a Scene class. You create objects, materials, lights, and cameras directly from Python:
import rv

class BasicScene(rv.Scene):
    def generate(self, seed):
        self.world.set_params(sun_intensity=0.03)
        cube = (
            self.objects.cube()
            .set_location((1, 0, 0.5))
            .set_scale(0.5)
            .set_tags("cube")
        )
        sphere = (
            self.objects.sphere()
            .set_location((-1, 0, 1))
            .set_shading("smooth")
            .set_tags("sphere")
        )
        plane = self.objects.plane(size=1000)
        empty = self.objects.empty().set_location((0, 0, 1))

        cam = (
            self.camera
            .set_location((7, 7, 3))
            .point_at(empty)
)This keeps scene generation compact while still giving you access to Blender-native behavior. See examples/1_primitives/scene.py.
IDE support
Use rv python install command to add rv to the current active python virtual environement. This will add code completion for rv into your IDE of choice. It is recommended to create an empty virtual environment from scartch. It will not be used in the runtime, it is meant for IDE support only.
Live preview
rv preview watches your scene script, reloads it on change, and gives you a fast iteration loop before running a full render.
The default mode opens a Blender window:
rv preview examples/1_primitives/scene.pyUse this when you want the normal interactive Blender view while editing geometry, materials, lighting, or camera placement.
If you want rendered preview outputs written to disk on every change, enable preview files:
rv preview examples/1_primitives/scene.py --preview-filesThis combined mode does both: it keeps the Blender window open and also writes a single preview sample into ./preview_out by default. You can change the output folder with --preview-out, set the image size with --resolution WIDTH,HEIGHT, and limit render time with --time-limit.
For a headless workflow, add --no-window together with --preview-files:
rv preview examples/1_primitives/scene.py --preview-files --no-windowThis mode does not open Blender. Instead, it continuously refreshes the preview files on disk, which is useful for remote environments or when you only want image outputs.
TLDR; Live-preview workflows are:
- Default: Blender window only.
- Headless:
--preview-files --no-window. - Combined:
--preview-filesfor Blender window plus rendered preview files on disk.
Seed
Every Scene.generate(...) call receives a seed value. Use it to drive your randomization in a reproducible way:
import random

class BasicScene(rv.Scene):
    def generate(self, seed):
        rng = random.Random(seed)
This is the recommended pattern for scene variation. A fixed seed reproduces the same generated scene, while different seeds produce different parameter samples.
You can control the seed from the CLI for render, preview, and export:
rv render scene.py --seed rand
rv render scene.py --seed seq
rv render scene.py --seed 42rand: choose a random seed for each run.seq: use deterministic sequential seeds across generated outputs.<integer>: force one specific seed for reproducible results. In this case only rendering with-n 1makes sense because all renders will be same.
See examples/2_properties/scene.py for a simple random.Random(seed) workflow.
Generate helper assets outside Blender
Some assets are easier to produce with a small external script than with Blender nodes alone. For example, textures with text or assets that require some non-trivial computations. rv provides a mechanism of generators to achive this goal.
Generator is a program that receives a JSON request on stdin with the current scene seed, root_dir, work_dir, and any keyword parameters you pass from Python. It returns JSON on stdout as {"result": ...}.
Envoke a generator like this:
generator = self.generators.init("uv run ./gen.py")
texture_path = generator.generate_path()
Use
generate(...)for any JSON-compatible result.generate_path(...)for file-producing generators.generate_str(...)for string results.generate_num(...)for numeric results.
This keeps the main scene script focused on scene assembly inside Blender, while small sidecar scripts can generate assets with regular Python libraries.
By default, each run gets its own work directory under <root_dir>/generated. You can move it elsewhere with --gen-dir:
rv render examples/9_generator/scene.py --cwd examples/9_generator --gen-dir ./tmp/genCleanup is controlled by --gen-retain:
all: keep every generator work directory.last: keep only the most recent one.none: remove all generator work directories after the command finishes.
The command defaults are chosen for the common workflow:
rv preview:last, so you can inspect the latest preview artifacts.rv render:none, so large batch renders do not accumulate temp files.rv export:all, so exported scenes keep all referenced generated assets by default.
See examples/9_generator/scene.py and examples/9_generator/README.md.
Import reusable assets from .blend files
When geometry is more complex than a few primitives, design it in Blender and import from Python. rv loads named objects from a .blend file and returns an ObjectLoader:
rock_loader = self.assets.object("./rock.blend", "Rock")
rock = rock_loader.create_instance()
This is the recommended workflow for artist-made assets, procedural Blender setups, and scenes you want to reuse across multiple dataset scripts. See examples/2_properties/scene.py.
Building shader graph
rv can also build Blender shader graphs directly from code, which makes it possible to define materials procedurally from Python instead of preparing every node setup by hand.
base = rv.TextureImage("base.jpg") * 0.7 + 0.1
normal = rv.NormalMap(
    color=rv.TextureImage("normal.png", colorspace="Non-Color"),
    strength=0.2,
)
shader = rv.PrincipledBSDF(
    base_color=base,
    roughness=0.35,
    metallic=0.05,
    normal=normal,
)
material = rv.ShaderMaterial(shader, name="ShaderGraphMaterial")This feature is still in development. Most shader nodes are not available yet, so for now it should be treated as experimental.
Parametrize the scene
Synthetic data usually needs variability. In rv, the preferred way to expose that variability is to keep procedural logic in Blender and drive it from Python using object properties.
Material nodes
To control a material from Python:
- Add an
Attributenode inside the material node graph.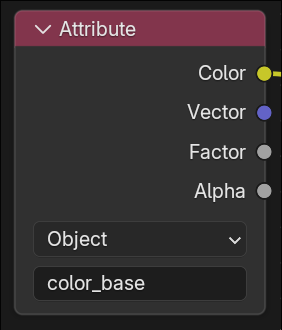
- Set the attribute name, for example
color_base. - Set Attribute Type to Object.
- Read that value in the shader and assign it with
set_property(...).
obj.set_property("color_base", (0.93, 0.92, 0.91))Modifiers
For procedural object generation, a good pattern is to keep the modeling logic inside a Geometry Nodes modifier and parameterize it from Python.
To control a Geometry Nodes modifier from Python:
- Add a Geometry Nodes modifier to the object in Blender.
- Expose the inputs you want to randomize on the modifier interface.
- Change those inputs from Python with
set_modifier_input(...).
Minimal Python side:
obj.set_modifier_input("seed", 123.4)If the object has multiple Geometry Nodes modifiers, pass modifier_name as well:
obj.set_modifier_input("seed", 123.4, modifier_name="RockGenerator")This keeps procedural modeling inside Blender, while Python only supplies the randomized parameters that drive the modifier.
Note that this workflow is not limited to Geometry Nodes modifiers and can by applied to other modifiers as well.
Scatter many objects without manual placement
rv includes multiple geometry-based scattering workflows for filling a domain with many objects while keeping them separated.
Create a domain:
domain = rv.Domain.ellipse(center=(0, 0), radii=(12, 6), z=0.0)Scatter simple instances:
self.scatter_by_sphere(source=object_loader, count=350, domain=domain, min_gap=0.15)Scatter with mesh-aware placement:
self.scatter_by_bvh(source=object_loader, count=300, domain=domain, min_gap=0.2)Scatter procedural instances with per-object parameters:
self.scatter_parametric(source=source, count=30, domain=domain, strategy="bvh")The available example scenes show three useful patterns:
examples/3_scattering/ellipse_2d.py: fast planar scattering inside an ellipse.examples/3_scattering/hull_3d.py: fill a 3D convex hull volume.examples/3_scattering/parametric_scatter.py: vary each placed instance with a sampler/applier pair.examples/3_scattering/custom_domain.py: define a custom 3D domain for the regionabs(z) > x^2 + y^2.
You can also define your own scatter domain by providing membership and bounding-box functions:
domain = rv.Domain.custom(
    dimension=3,
    contains_point=lambda point, margin: (
        (point.z * point.z) < (point.x * point.x + point.y * point.y)
    ),
    aabb=lambda inset_margin: (
        rv.Vector((-10.0, -10.0, -6.0)),
        rv.Vector((10.0, 10.0, 6.0)),
    ),
)
For many synthetic scenes this is enough. If you need physically plausible final resting positions, use rigid body simulation after or instead of geometric scattering.
Export semantic material masks with shader AOVs
Object tags are useful for instance-level labeling, but many datasets also need masks for material regions such as rust, dirt, paint, or wear. rv supports this through Blender shader AOVs.
On the Blender side, write your mask into an AOV Output node named <channel>:
rust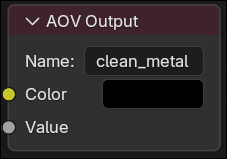
Enable the same channel in Python:
self.enable_semantic_channels("rust", "clean_metal")Optionally control binarization:
self.set_semantic_mask_threshold(0.5)When rendered, rv exports semantic masks such as Mask_rust*.png and Mask_clean_metal*.png. See examples/4_semantic_aov/scene.py and examples/4_semantic_aov/README.md.
Use Blender rigid body physics when placement must look real
For piles, collisions, toppling objects, or any scene where contact matters, rv lets you set up rigid bodies and run Blender physics directly from the script.
Add rigid bodies:
plane.add_rigidbody(mode="box", body_type="PASSIVE", friction=0.9)cube.add_rigidbody(
mode="box",
body_type="ACTIVE",
mass=0.2,
collision_margin=0.01,
use_deactivation=True,
deactivate_linear_velocity=0.15,
deactivate_angular_velocity=0.2,
)Run the simulation:
rv.simulate_physics(
    frames=120,
    substeps=12,
    solver_iterations=30,
    use_split_impulse=True,
    time_scale=1.0,
)
This is especially useful for generating non-intersecting object piles and impact scenes. The physics examples include:
examples/5_physics/simple.py: a minimal falling-object setup.examples/5_physics/scatter.py: drop many randomized cubes into a box.examples/5_physics/wall_break.py: simulate an impact that breaks a wall.
Export generated scenes and reuse them later
Some scenes are expensive to build, especially if they depend on simulation. rv can save the generated result as a .blend file and reuse it in another script.
Export a scene:
rv export examples/6_export/export.py -o examples/6_export/exported.blend --freeze-physicsLoad the saved objects later:
loaders = self.assets.objects("exported.blend", import_names=CUBE_NAMES)Instantiate them as many times as needed:
obj = loader.create_instance()This is useful when you want to simulate once and then render many camera or lighting variations from the saved result. See examples/6_export/export.py, examples/6_export/import.py, and examples/6_export/README.md.
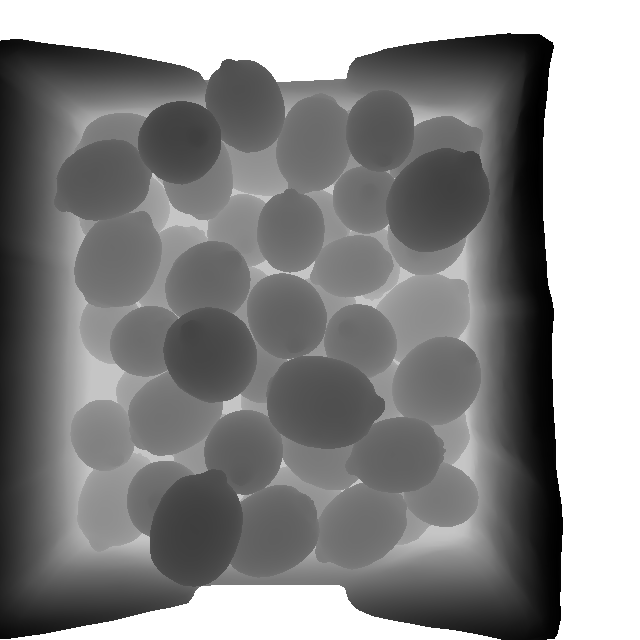
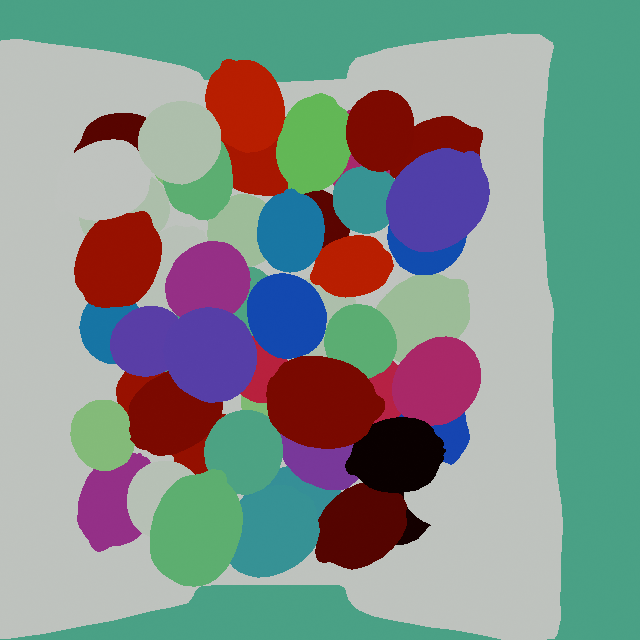
Preview textures
Exported depth and index masks are not comprehendable by human eye. Thats why rv exports additional preview masks alongside them.
Additional information
Start with the small examples in examples/, then use the API reference when you need the full method signatures.